#
Active Directory Lab

Hello everyone, welcome to my blog on setting up a simple AD lab for practicing Incident Response, Threat Hunting, and Digital Forensics. Once set up, the lab can be easily customized based on use cases, making it more flexible. In this blog, I am focusing only on a host-based incident response scenario, so the policies and integrations I am adding are tailored to that. To make the lab more realistic, the lab's theme is centered around a hypothetical tech company named XOPS.
#
Setting up the Lab
We’re building the infrastructure for XOPS, which includes both Windows and Linux machines connected to the AD environment. The Linux systems are primarily used for automation and backup services. Certain users are restricted to logging in only on specific computers, and the Linux server has LDAP enabled for SSH authentication.
In this lab we are only using Windows Defender as endpoint security product and not relying on any EDR/XDR products.
You can refer to Active Directory Lab by AdiH8 for setting up the DC and configuring a basic AD Environment, this requires manual interactions, but if you prefer automated setup you can use GOAD project.
This is how my setup looks like, I have 16 GB of ram in my system, so if yours is less you can reduce the number of client machines.
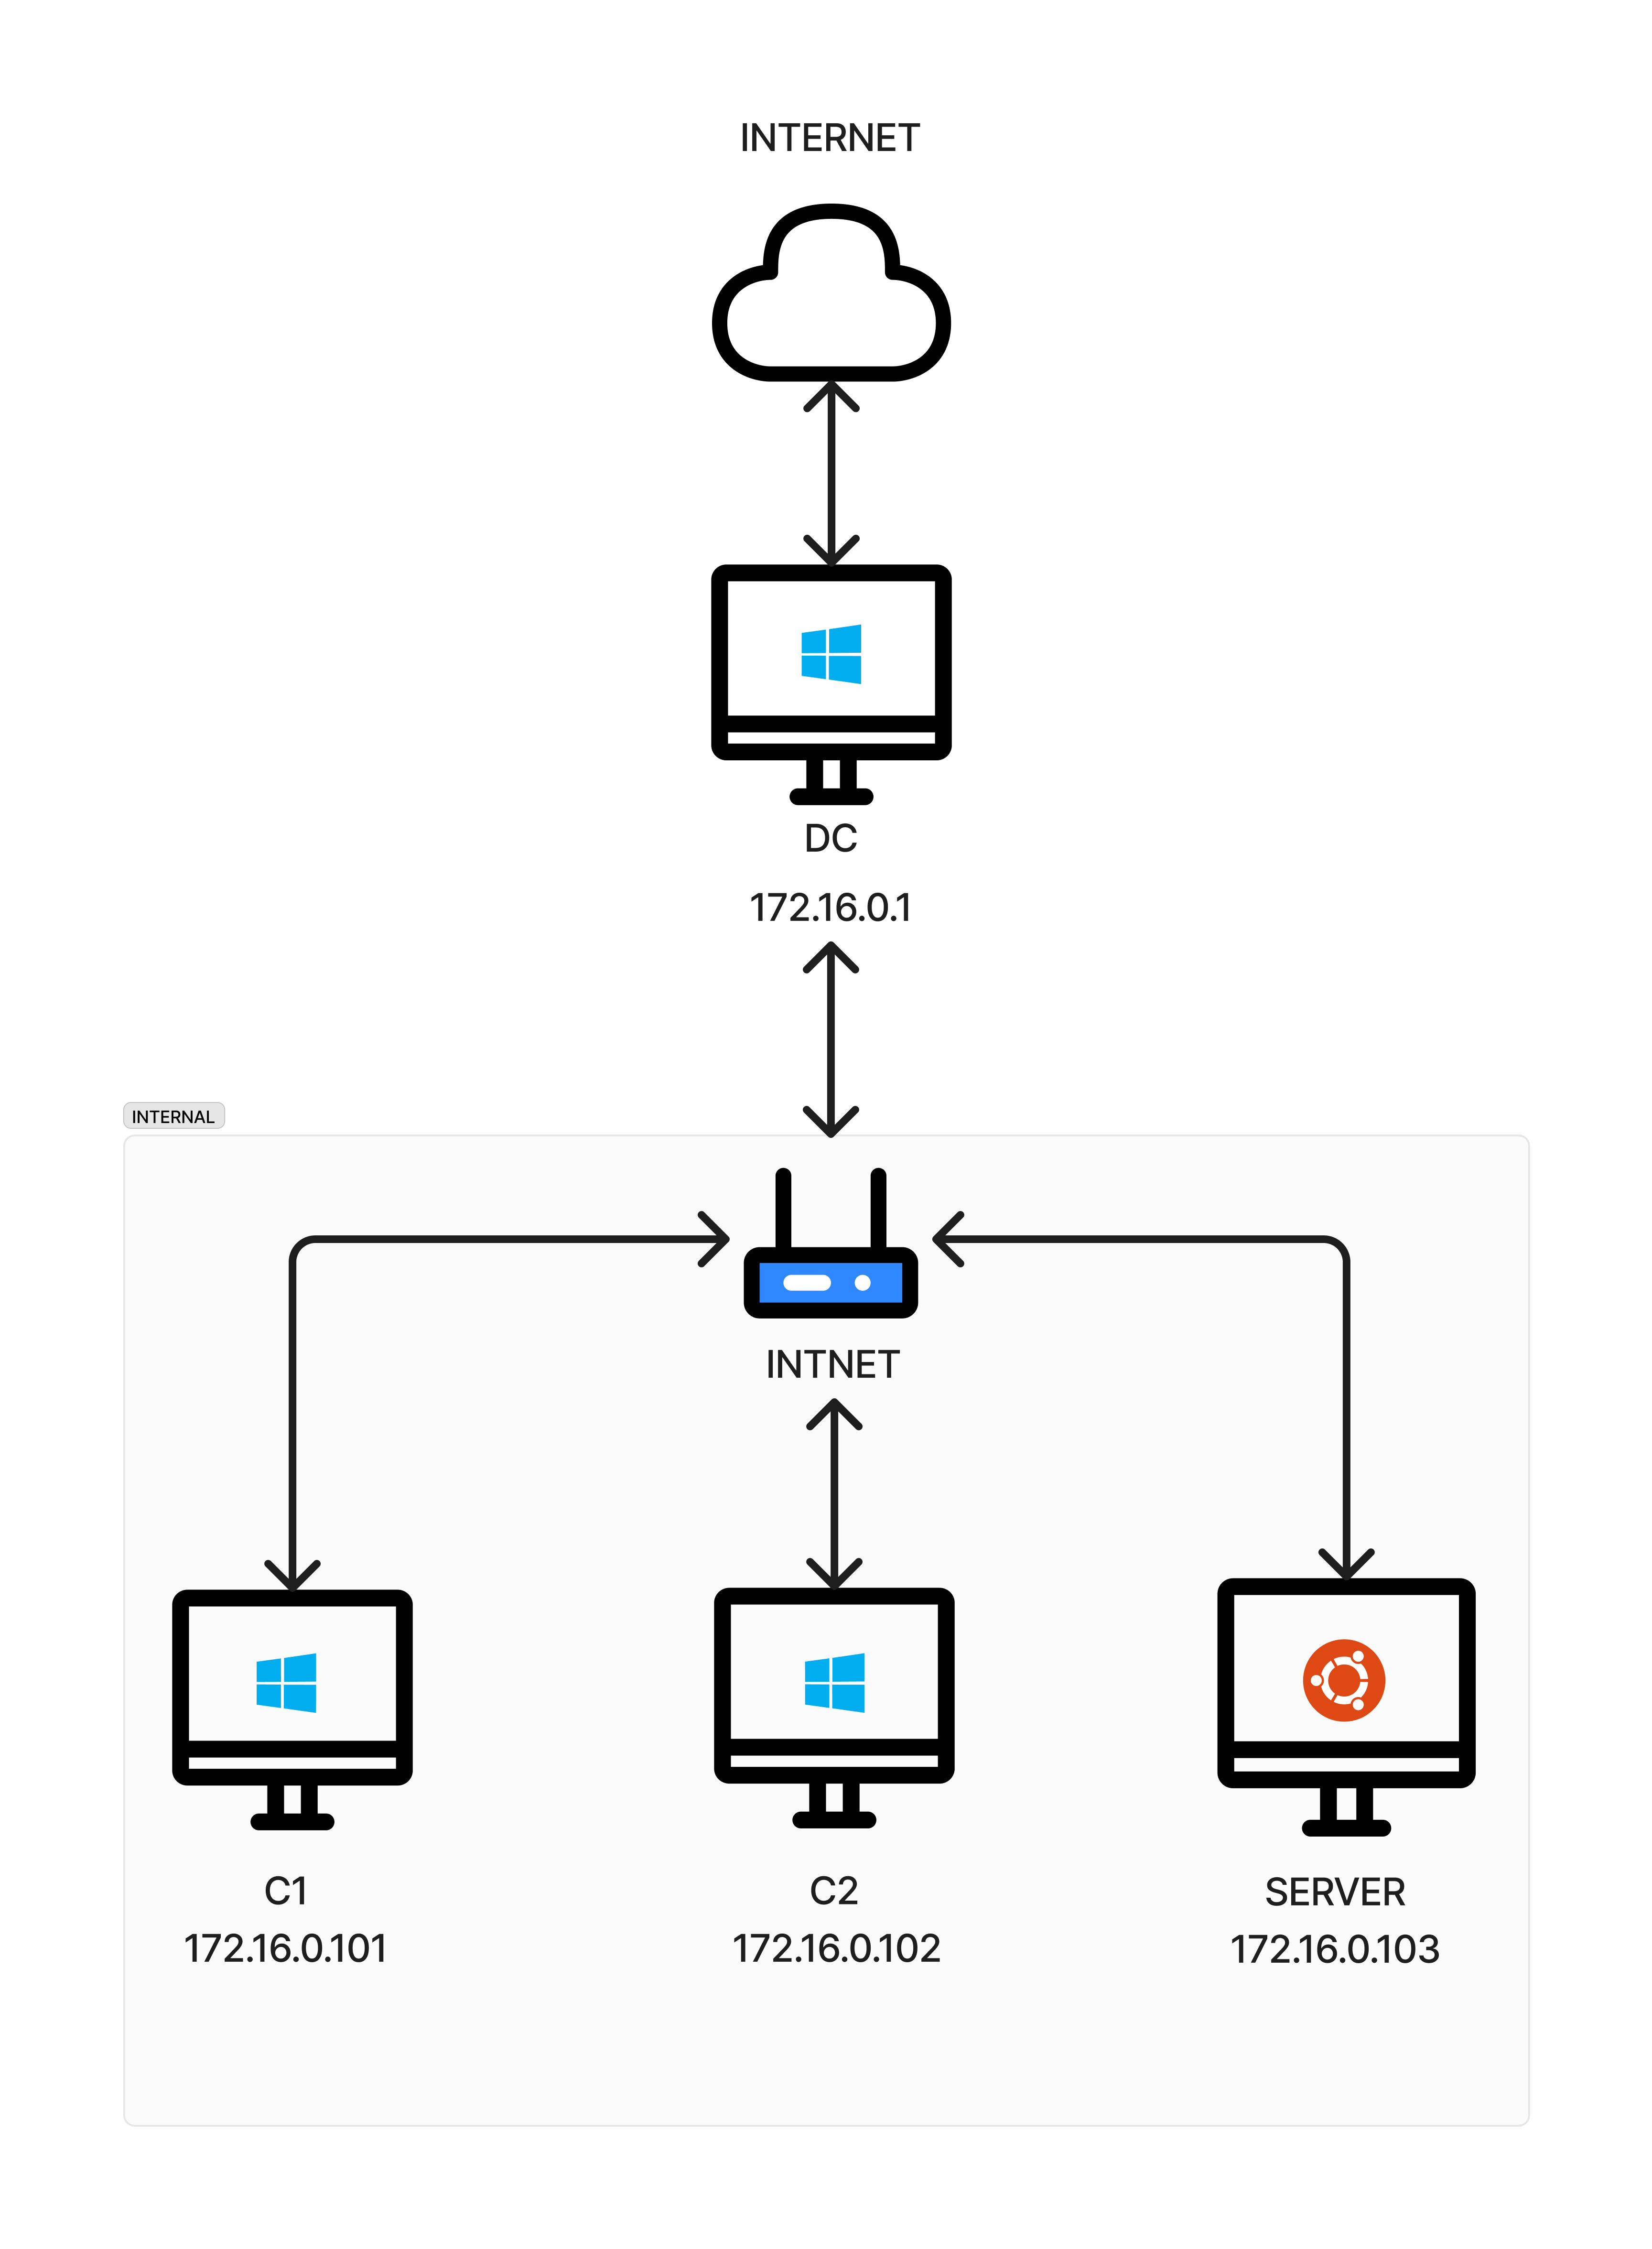
Configuring Ubuntu Server to join AD Machine
We need to configure ubuntu server to allow AD users ssh login via LDAP. Configuring it is relatively simple. Make sure to set DNS in /etc/resolv.conf to the IP of DC, in my case its 172.16.0.1.
# Install necessary programs
sudo apt update
sudo apt install realmd sssd sssd-tools libnss-sss libpam-sss adcli

# check if domain is discoverable from the ubuntu, If its not detecting make sure dns is set correct
sudo realm discover xops.local

# join the domain
sudo realm join --user=DomainAdmin xops.local

# list joined domain
sudo realm list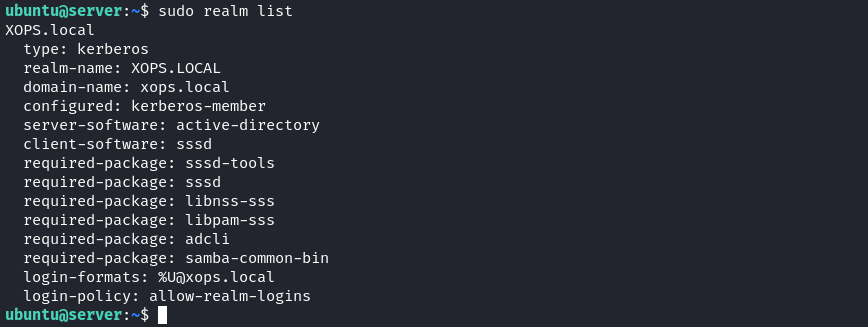
After joining the domain, we have to configure few settings to make sure home directory are correctly generated for the domain users, also to make login easier by removing the need of entering domain name along with username (e.g user instead of user@xops.local).
Edit /etc/sssd/sssd.conf and make sure the following line are included, this will allow domain users to ssh login using only their username without the need of specifying domain name.
use_fully_qualified_names = False
Then run the following command to automatically create home directory for domain users.
sudo pam-auth-update --enable mkhomedirRestart the sssd service to apply all changes .
sudo systemctl restart sssd
#
Configuring Logging On Machines
In this section we will setup logging mechanisms for both Windows and Ubuntu Machines.
#
Setting Up Auditing in Windows Machines
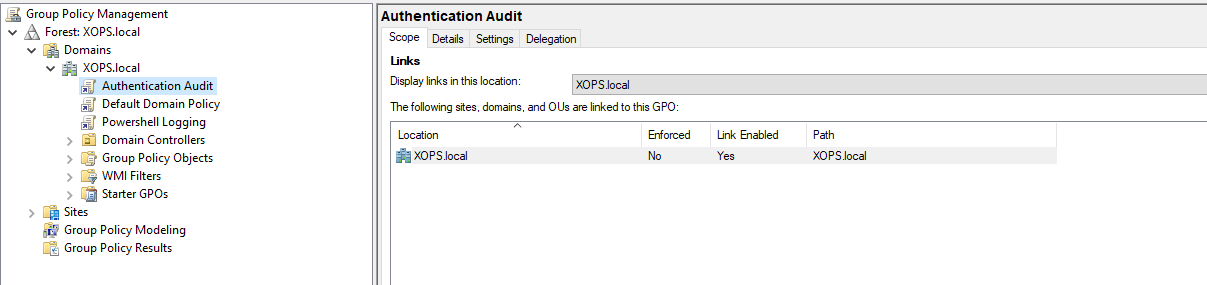
Active Directory provides auditing capabilities, with audit policies created and managed through Group Policy Objects (GPOs). These audit policies provide visibility into various security-related activities, such as account logon attempts, changes to user accounts, access to sensitive resources, and system-level events.
New GPO can be created by right clicking on Domain in Group Policy Management application in DC Machine.
Some of the important policies and their corresponding event ids we will focus on this blog are :
-> Logon Auditing
Logon events help us identify any malicious or anomalous behaviors related to user logons.
-> Kerberos Auditing
Kerberos events gives us better visibility into how tickets are used and helps detect malicious actions related to Kerberos.
-> Privilege Auditing
Sensitive privilege events helps us identify unusual usage of elevated permissions and privileged users.
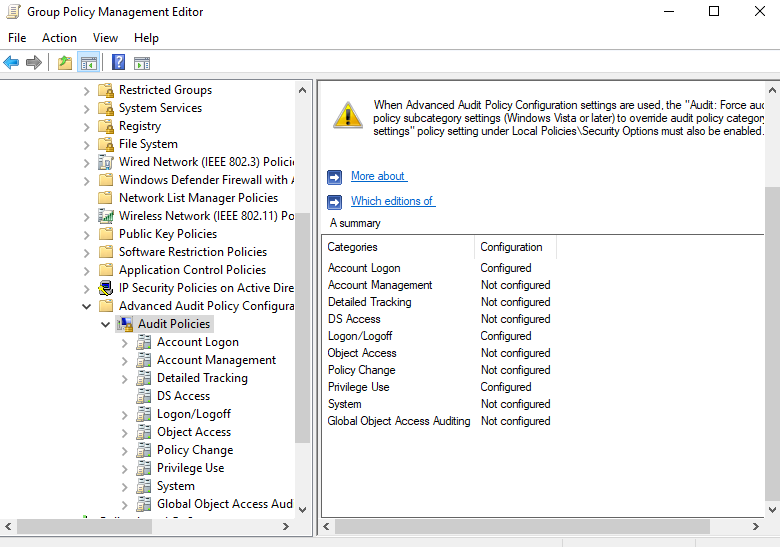
These event logging can be enabled under
Computer Configuration -> Policies -> Windows Settings -> Security Settings -> Advanced Audit Policy Configuration -> Audit Policies- Logon Auditing : Logon/Logoff -> Audit Logon , Audit Special Logon
- Kerberos Auditing :
Account Logon -> Audit Kerberos Authentication Service , Audit Kerberos Service Ticket Operations - Privilege Auditing : Privilege Use -> Audit Sensitive Privilege Use
--> Powershell Logging
Powershell logging is essential to identify malicious scripts run on endpoints, it can be enabled under :-
Computer Configuration -> Policies -> Administrative Templates -> Windows Components -> Windows Powershell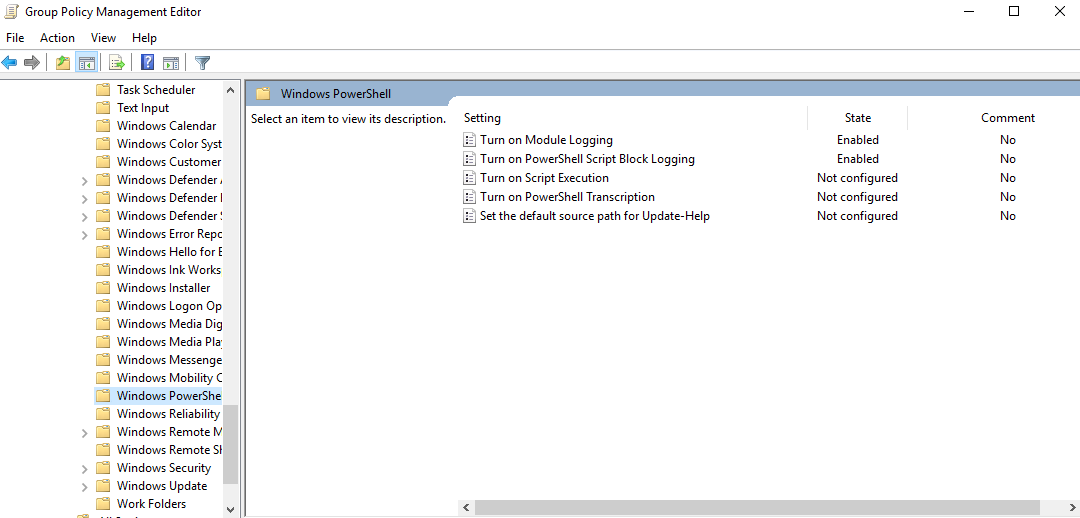
--> LDAP Query Monitoring
Monitoring LDAP queries offers an advantage in detecting potential Kerberoasting and AS-REP Roasting attempts.
So, for detailed logging of ldap queries, we will enable ldap client verbose by updating 4 registry keys.
Computer Configuration -> Preferences -> Windows Settings -> Registry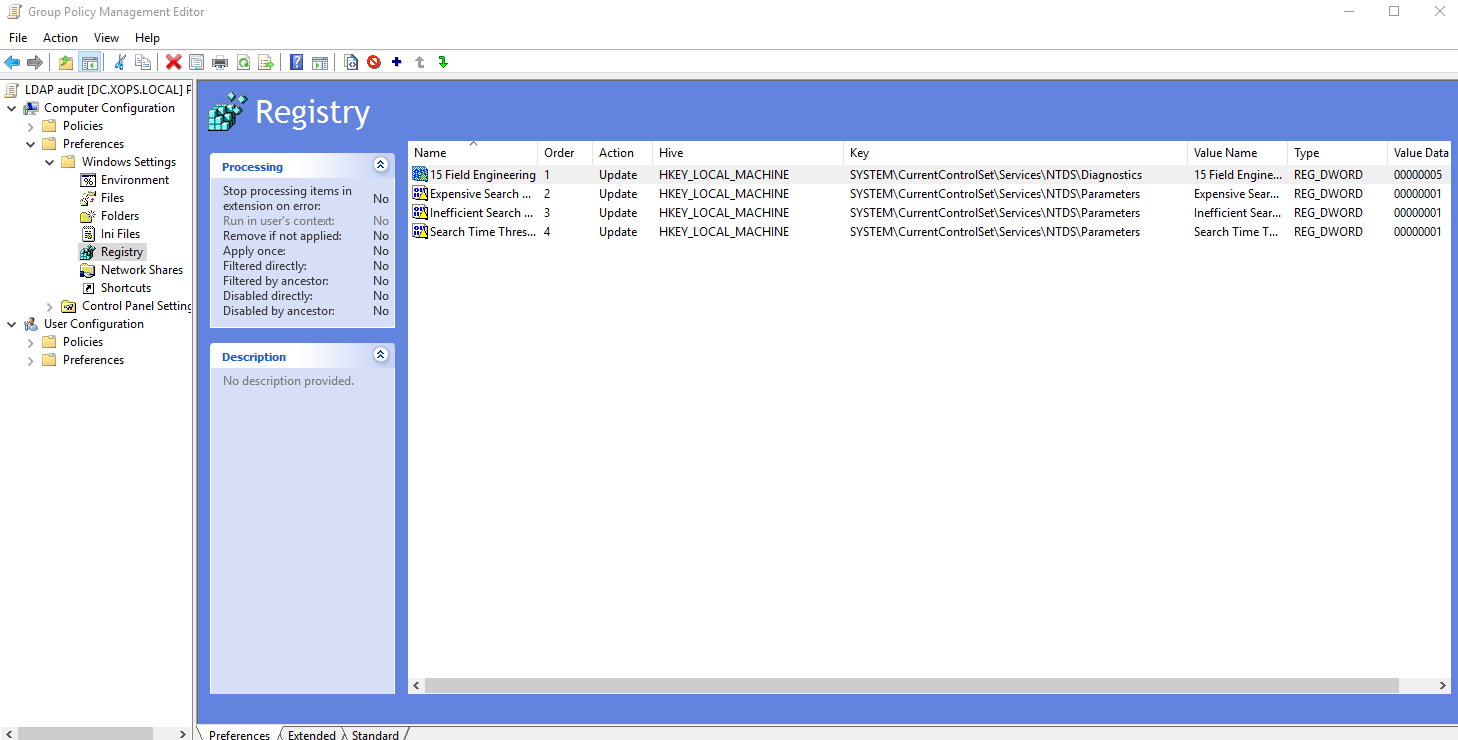
#
Installing Sysmon
Sysmon offers enhanced logging capabilities for process creation, network connections, and file access-related information. Deploying Sysmon in any Active Directory (AD) environment is highly recommended for improved security monitoring.
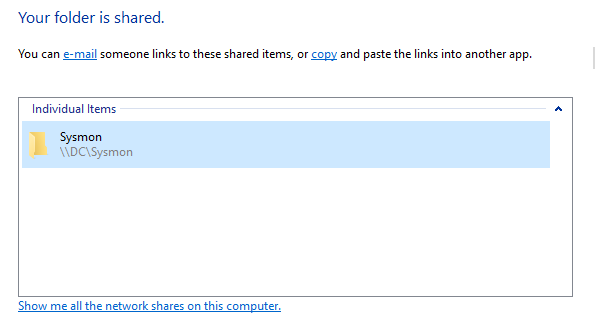
We can deploy Sysmon on all systems using GPO policy. Download the Sysmon executable and create a share in the DC for deployment. Sysmon's power relies on how we configure the tool, by default sysmon doesn't offer high level of logging, but with proper configuration we can improve it. I used SwiftOnSecurity's sysmon config as the base config as it covers starter rules, we can modify from there based on our needs.
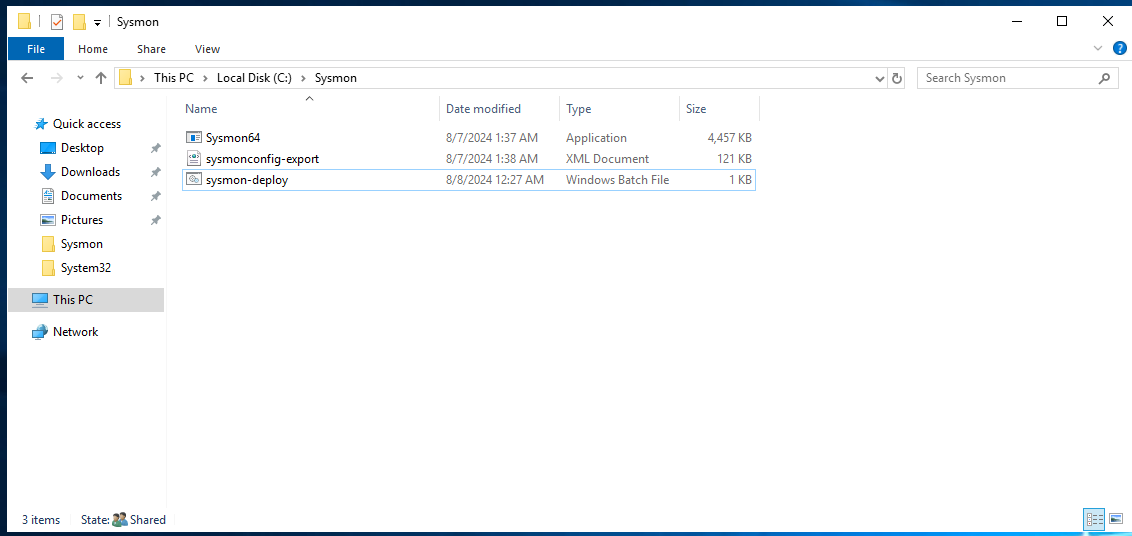
We can use batch script to automate sysmon deployment, this will make things easier and we don't need to go to all machines and install from there manually.
:: - Reference : https://cybergladius.com/automated-sysmon-deployment/
@echo off

:: - Variables for script.
set str_sysmonShare=DC\Sysmon

:: - Check if running as an Admin
net.exe session 1>NUL 2>NUL || (Echo This script requires elevated rights. & Exit /b 1)

:: - Check is SysMon is running
sc query "Sysmon64" | Find "RUNNING"
If "%ERRORLEVEL%" EQU "1" (
goto StartSysmon
)

:: - Check if SysMon is installed, if not install it.
:StartSysmon
net start sysmon64
If "%ERRORLEVEL%" EQU "1" (
goto InstallSysmon
) else ( exit 0 )

:: - Install the SysMon agent from the Share.
:InstallSysmon
"\\%str_sysmonShare%\Sysmon64.exe" -i -accepteula
If "%ERRORLEVEL%" EQU "1" (
echo "An Error occured while loading the SysMon Config."
)

exit 0
Then we have to add Domain Computers group read access in share, which makes the share accessible for all computers.
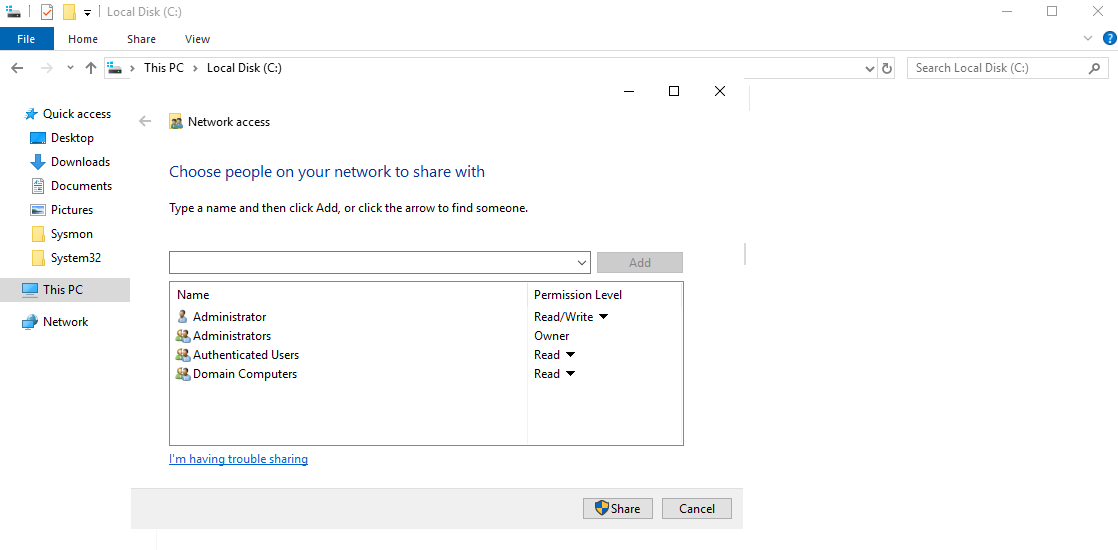
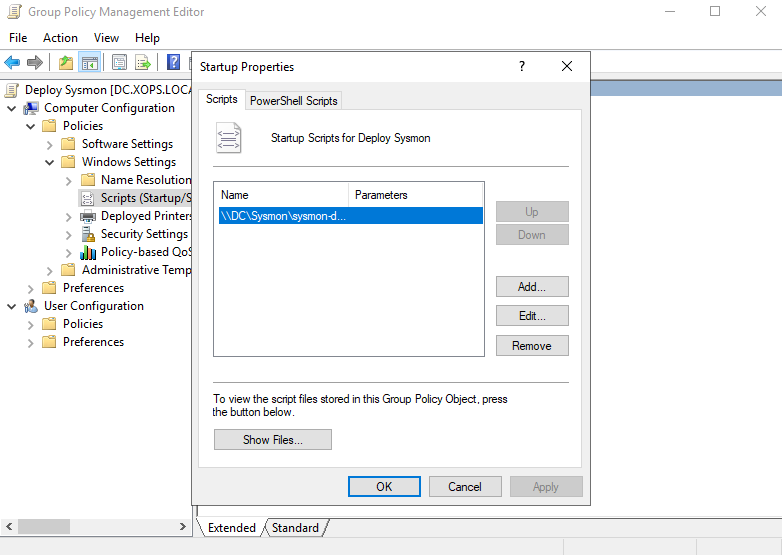
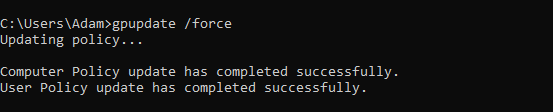
Finally create the GPO and add the batch file in Startup scripts, apply gpudate /force on clients and reboot.
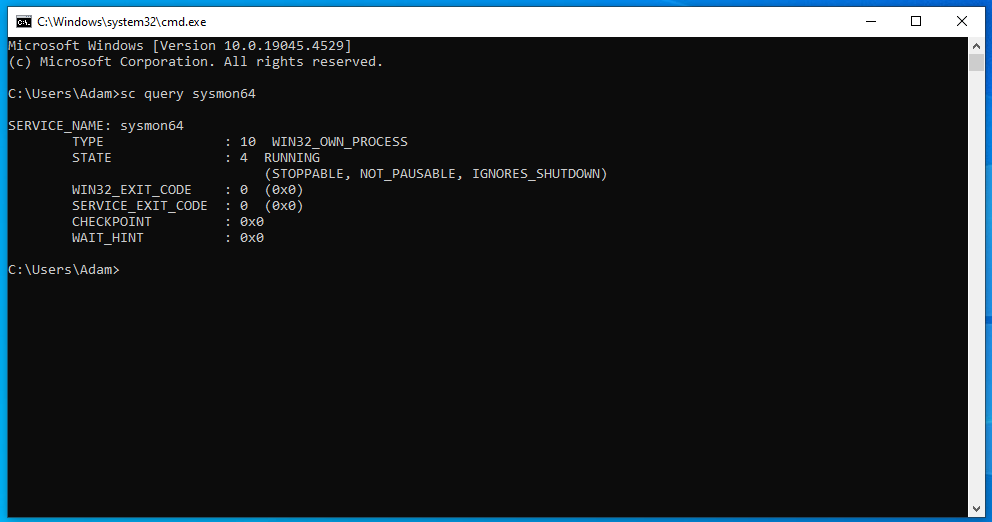
Use sc query sysmon64 to verify the Sysmon Service is running.
Some Important event ids generated by Sysmon are :-
#
Configuring Ubuntu Machine
For setting up logging in ubuntu we will use auditd. auditd is the Linux Audit daemon responsible for tracking and logging system activities. It provides detailed event records, including file access, user actions, and security policy changes, making it valuable for monitoring and incident response.
# install auditd
sudo apt install -y auditd
By default auditd only logs events like ssh login, use of sudo, pam. This is great but can be improved to get more telemetry from the systems. We can monitor specific files and folders for any modifications being occured there. Monitoring /tmp/ folder is highly useful to trace if any data is being dumped there and so on.
We can monitor tmp folder by applying this auditd rule :
sudo echo "-w /tmp/ -p rwxa -k tmp_watch" > /etc/audit/rules.d/audit.rulesWhat it does is, monitor tmp folder for any read,write,execute,append actions performed. Then we have to restart auditd service to apply the rule.
sudo systemctl restart auditd
#
Installing SIEM Agents on Machines
For SIEM, ELK stack is the best free option. Elastic even provides a 14 day free trial of their cloud version so we don't have to setup anything locally.
Once the free account is created, Install the elastic agent on the DC and clients, refer here for a detailed guide on installing the agents. Agents can be also deployed using GPO, but here i installed them manually on clients and DC.
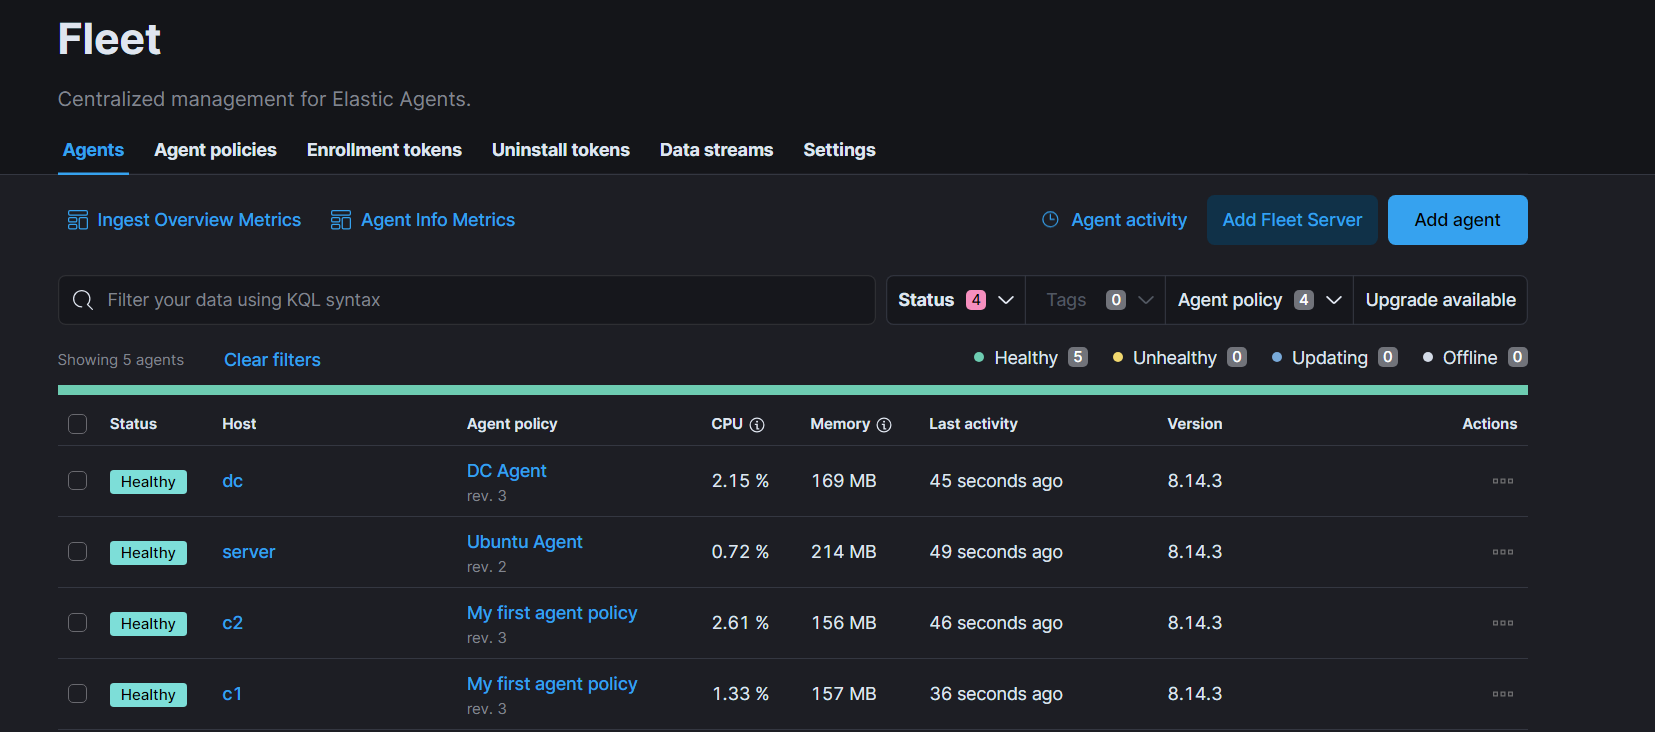
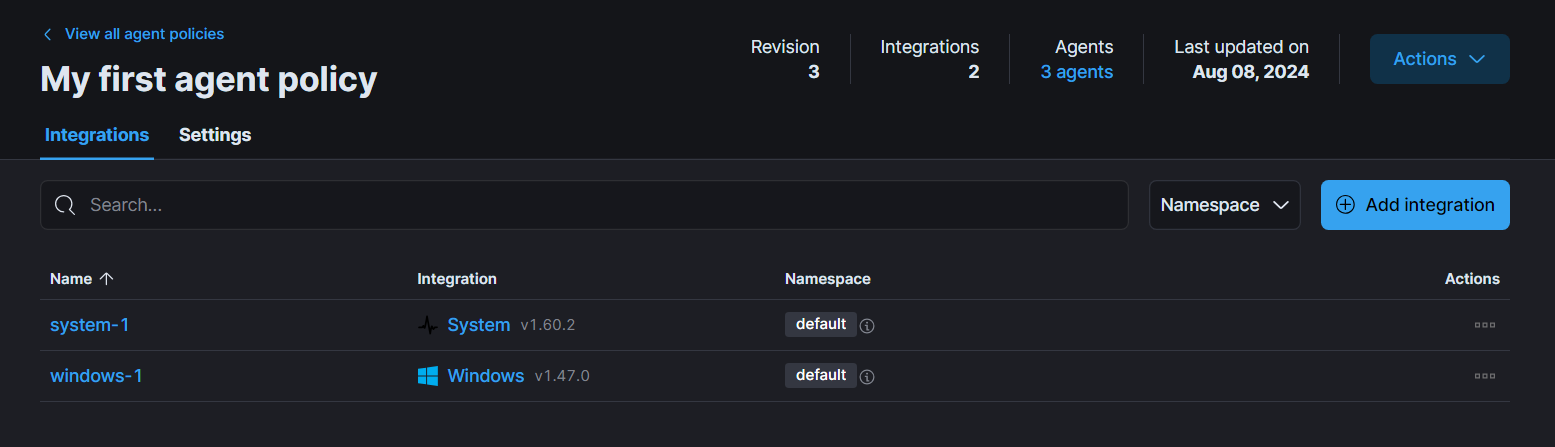
Once the agents are installed, enable the System integration and Windows integration for the agents. These two integrations will forward events from Application , Security , Sysmon and Powershell/Operational event log channels.
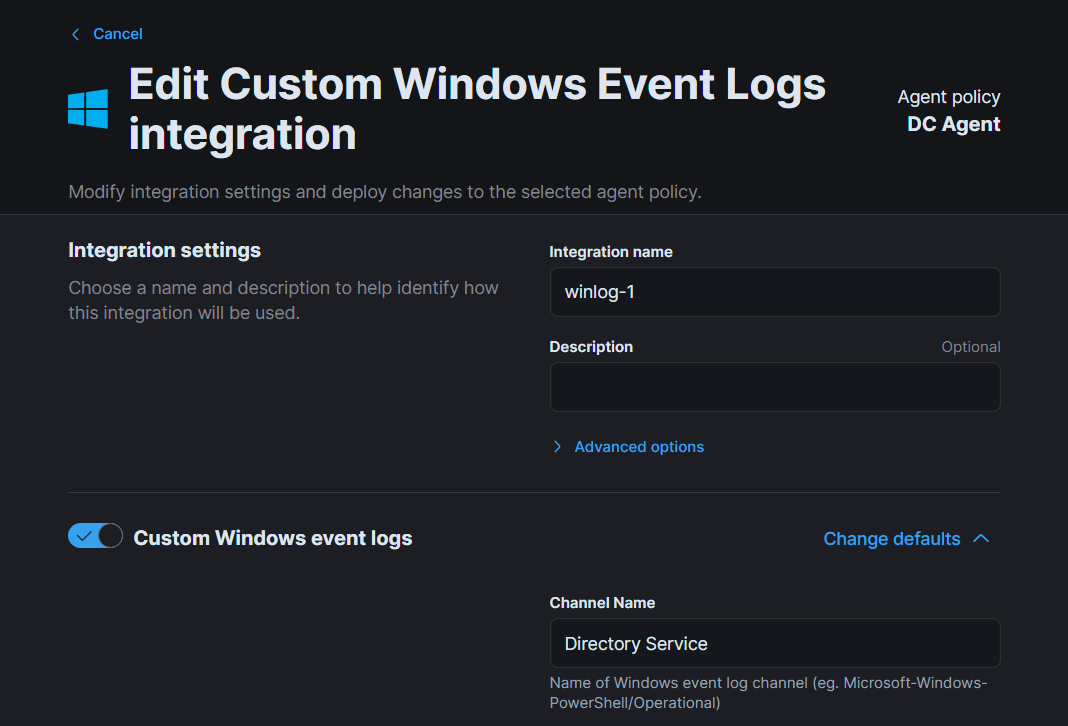
For DC, we need to create a separate agent policy and add one more additional integration named Custom Windows Event Logs to collect LDAP queries.
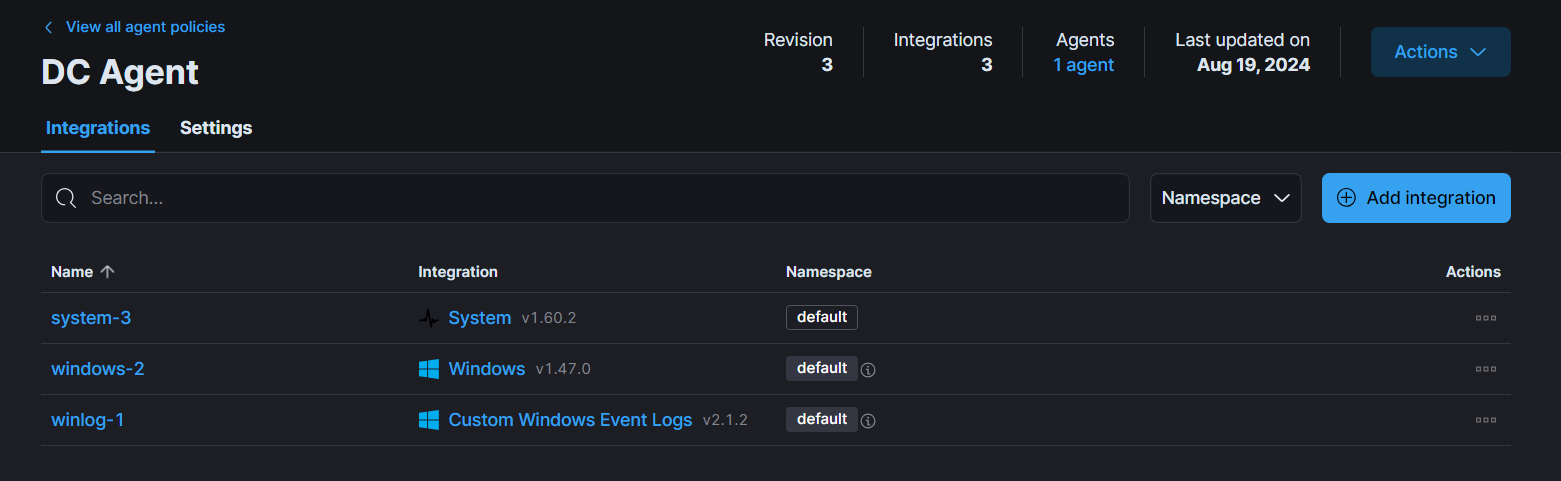
In the channel name enter : Directory Service.
And for linux machines, we need to use auditd integration.

With this, our Lab is setup to log many of the events and we can conduct different types of attack simulations for learning Incident Response, Digital Forensics and Threat Hunting. You are free to add more integrations and logging mechaninsms to make this lab even better for your use-cases.
Check out an example Incident Response scenario based on this Lab :-